Friday, April 30, 2010

小动物的华语名称

新加波人讲华语常常参了一些英语名称, 久而久之,就忘了那些英语的华语名称,比如
Guinea pig, Hamster 等小动物的华语名称。

以下是一些小动物的华语名称:

Guinea pig = 天竺鼠
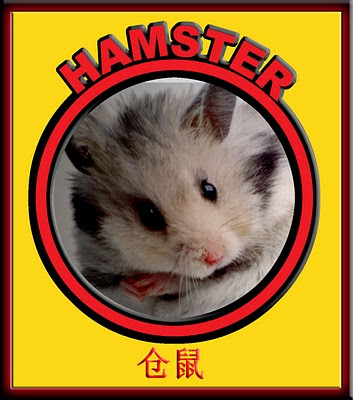
Hamster = 仓鼠
Squirrel = 松鼠
Vole = 田鼠
Jerboa = 跳鼠
Marmot = 土拔 鼠


Sunday, April 25, 2010

Use Illustrator 10 to construct a wavy circle

Use illustrator 10 to draw a wavy circle.
  1. Use (Ellipse tool) draw a circle with stroke equal "10" and color black.
  2. Click (Rotate Tool) and press "Alt" key to bring down the Transform Window, set the rotating angle to 20 degrees and check "copy".
  3. Click (Object)(Rotate)(Transform Again) to add a circle.
  4. Repeatedly click the (Transform Again) until the complete circle is formed.
  5. Draw a big circle co-center with the above group-circles.
  6. Click (Select)(all) to select all circles.
  7. Start pathfinder window and click (Add shape) button to make the group-circles into a wavy circle.
  8. Save the work.
  9. Start Photo Shop 7, open the wavy circle and a photo, use the masking method to select picture from the photo.
  10. Work done.


Saturday, April 24, 2010

Friday, April 23, 2010


Forming a shape of spade:
  1. Start Illustrator 10.
  2. Use Ellipse Tool to draw 2 circles and a square.
  3. Rotate the square into 90 degrees.
  4. Arrange them together in the form of heart shape.
  5. Click (Window)(Pathfinder) to bring down the Pathfinder Window, then click (Add to shape) button to erase lines within the heart shape.
  6. Use Ellipse Tool again to draw 2 circles and a rectangle.
  7. From the Pathfinder window click (Subtract from shape) button to form a handle.
  8. Put them together to form a spade.
  9. Save the work.
  10. Start Photo Shop 7 and use the previous method to do the selection of pictures from the photos.


Thursday, April 22, 2010

Transform a Picture into a Pictorial Circle
It is easy to transform a picture into a pictorial circle by using Illuatrator 10.
  1. Open a picture such as Mickey Mouse, then click The "Rotate Tool" and press "Alt" key to bring down the Rotating Window, Set the rotating angle to 20 degrees and check "Copy".
  2. Click (Object)(Transform Again) to add another picture into the circle.
  3. Click repeatedly the (Transform Again) until it form a complete circle.
  4. Set the background to transparent.
  5. Draw a white circle co-center to the pictorial circle, click (Object)(Arrange-Send to the back) to send the white circle to the back.
  6. Save the pictorial circle.
  7. Start Photo Shop 7, open a photo , open the pictorial circle and set the width and height to 4".
  8. Drag and drop the pictorial circle on to the photo.
  9. Use the pictorial circle as a mask to select the picture from the photo.
  10. Color the background with white.
  11. Press "Fatten Image".
  12. Save it as jpeg image.


Monday, April 19, 2010

Use illustrator graphic to mask the picture from the photo.

To add circular-tests on the photo is much easy by using Illustrator 10.

1. Open the Illustrator 10 and use Shape Tool-(Circle) to draw a circle without color.

2. Click on the circle and choose Text Tool to type the texts that you want to put into the photo.

3. Draw a circle with the color same as texts' color.

4. Save the graphic.

5. Open Photo Shop 7 and then open illustrator graphic.

6. Open the photo that you want to do the selection.

7, Drag and drop the graphic on to the photo.

8. Control-click the graphic layer to select the graphic.

9. Click (Selection-Inverse) to inverse the selection.

10. Click on the photo layer then press delete key to delete the unwanted parts of photo.

11. Click "Flatten Image" to combine the layers.

12. Save the photo.


Thursday, April 15, 2010

Photoshop Channel Masks

Using the combination of Channel Masks and Magnetic Lasso Selection Tool to make a perfect human selection.

Sometime you have several shots of nice scenery and you wanted to put your own picture into the scenery you can use the following method to do the selection.
Use Photoshop 7 to open a photo contains a personal picture, follow the steps below to do the selection.

  1. Press control-A follow by control shift -J to create a "blank" layer.
  2. Duplicate Photo Layer then click (Window)(Channel) to bring down the Channel Window.
  3. Click the Blue Channel. (It shows the darkness of photo is darker than other channels).
  4. Press "d" to change the foreground color to black.
  5. Use Magnetic Lasso tool to select those parts which are not black enough.
  6. Use brush tool to paint the selected parts to black, then unselected the painted parts.
  7. Click (Image)(Level) to bring down the Level Window, move the tiny black triangle to the right to make the picture totally black, then Press "OK".
  8. Use the brush tool to paint the picture again in black.
  9. Click (Selection)(Load the Selection) to select the picture, click the Photo Layer and click (selection)(Inverse) to inverse the selection.
  10. Press the delete key to delete the background.
  11. Click the Picture Layer, and then click the (Layer)(Matting- Remove white Matt) to remove the tiny white spots around the edges.

Now you can drag and drop the human picture to any photo of scenery.
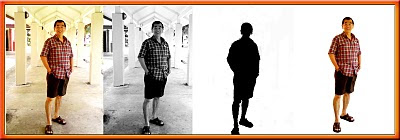

Use Channel Mask and Magnetic Lasso Selection Tool to select the human image.
Drag and drop the selected human picture into the photos of scenery.

Sunday, April 11, 2010

My grand-children hunting for Easter eggs

This is my red bag. I found a packet of Easter eggs. Put the Easter eggs into the bag. Mission is accomplished. This way ........... Looking arround......... I think .................. Look! this an Easter egg. Here are 3 Easter eggs. I found 3 Easter eggs. Put the Easter Eggs into the bag. Mission is accomplished