
Sunday, July 4, 2010
Saturday, July 3, 2010


Friday, July 2, 2010
26th.June, 2010 - My son Kelvin's Wedding Day
Kelvin and Huimin are being received by my two grand-children.


Friday, June 25, 2010

Monday, June 21, 2010

Sunday, June 6, 2010


Friday, June 4, 2010
New refrigerator
Last Friday morning accidentally cut off the vertical fan's wire, it caused the power supply broke down. At 5 pm I found the refrigerator had some funny sound, I thought the frig. is out of order. After the dinner I and May went to Court Mega Store to look for the new frig, but the price is comparatively high, so we went to another store called Mega Discount store at National Stadium to look for the new frig. At last we bought a Hitachi new frig which costs us $960. On Thursday the frig. is delivered to our place at 6.30 pm .


Monday, May 17, 2010

Sunday, May 9, 2010


Saturday, May 8, 2010
Lynn is going back to London
Hoo and Lynn

Kelvin and Lynn

May and Lynn

Huiminn and Lynn


I, my daughter Lynn,my son Kelvin, and my wife May at the departure hall.

Thursday, May 6, 2010
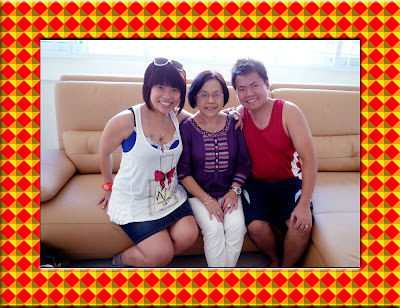
Photoshop Power Effect -pattern design
It is very interesting to add pattern backing to the photo. It make the photo look more colorful.
The method is shown as below:
Press Control-N to create a new document that is 40 pixels square at 72 pixels/inch. Save the document as blue diamond.


The method is shown as below:
Press Control-N to create a new document that is 40 pixels square at 72 pixels/inch. Save the document as blue diamond.
- Press (Edit)(Preference)(Unit & Ruler) and choose pixel as the unit.
- Click inside the left horizontal ruler, drag out the guide and place it at 5, 20 and 35 marks.
- Click the vertical left ruler, drag out the guide and place it at 5, 20 and 35 marks.
- click the Rectangular Marquee tool to draw a square and fill with blue color.
- click on the square and press Control-T to turn the free transform on.
- Rotate the square to 45 degrees.
- Use Magic Wand Tool to select each corner and color it with light orange, light blown,pink and light blue.
- Click (Edit)(define-Pattern) and name the pattern as Blue Diamond.
- Test the pattern by press Control -N to create a new document and fill it with the pattern you have just designed. Work done.

The photo of my wife, my daughter and my son with blue pattern backing.

The photo of my wife and my daughter with yellow pattern backing.

Friday, April 30, 2010
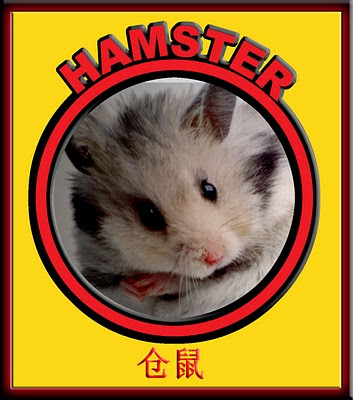
小动物的华语名称
新加波人讲华语常常参了一些英语名称, 久而久之,就忘了那些英语的华语名称,比如
Guinea pig, Hamster 等小动物的华语名称。
以下是一些小动物的华语名称:
Guinea pig = 天竺鼠
Hamster = 仓鼠
Squirrel = 松鼠
Vole = 田鼠
Jerboa = 跳鼠
Marmot = 土拔 鼠

Guinea pig, Hamster 等小动物的华语名称。
以下是一些小动物的华语名称:
Guinea pig = 天竺鼠
Hamster = 仓鼠
Squirrel = 松鼠
Vole = 田鼠
Jerboa = 跳鼠
Marmot = 土拔 鼠


Sunday, April 25, 2010
Use Illustrator 10 to construct a wavy circle
Use illustrator 10 to draw a wavy circle.

- Use (Ellipse tool) draw a circle with stroke equal "10" and color black.
- Click (Rotate Tool) and press "Alt" key to bring down the Transform Window, set the rotating angle to 20 degrees and check "copy".
- Click (Object)(Rotate)(Transform Again) to add a circle.
- Repeatedly click the (Transform Again) until the complete circle is formed.
- Draw a big circle co-center with the above group-circles.
- Click (Select)(all) to select all circles.
- Start pathfinder window and click (Add shape) button to make the group-circles into a wavy circle.
- Save the work.
- Start Photo Shop 7, open the wavy circle and a photo, use the masking method to select picture from the photo.
- Work done.

Saturday, April 24, 2010


Subscribe to:
Posts (Atom)